Quilt Binding Instructions with the Easy Miter Binding Tool

If you’ve been quilting for a while or are just starting out, you’re likely familiar with the challenges of quilt binding. Adding quilt bindings to your projects can often feel like a chore, especially when striving for those perfectly mitered and square corners. Well, there’s a sewing tool that promises to change all that – the Easy Miter Binding Tool.

Understanding the Easy Miter Binding Tool

Some of you might have found yourselves wondering how to achieve those crisp, clean quilt edges without the fuss. If that sounds familiar, then you’re exactly where you need to be. Stick around as we dive into the world of the Easy Miter Binding Tool, where we’ll cover everything you need to know to master those perfect quilt bindings. Keep reading to learn more about this great quilting tool.

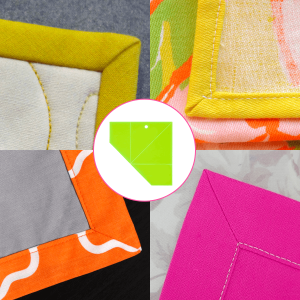
The Easy Miter Binding Toolis a clever invention for quilters of all levels. It allows you to use the backing fabric of your quilt to create quilt bindings, removing the need for separate quilt binding strips. This method is efficient and makes your quilt bindings consistent with perfectly mitered edges on a quilt

Step-by-Step Guide to Using the Tool

Here’s a straightforward guide on how to use the Easy Miter Binding Tool. This helps your quilt binding process smoother and more enjoyable.

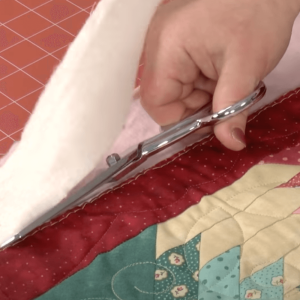
1. Prepare Your Quilt

Once you’ve finished quilting your piece, the first step is to trim the batting to match the quilt top. This is crucial for a neat finish. Use 8-1/2-Inch Fabric Scissors with Comfort Grip to cut along the edge.
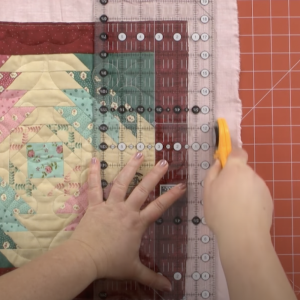
2. Trim the Backing

Decide how wide you want your finished quilt binding to be. In the step of ‘calculating binding for a quilt,’ trimming the backing fabric accurately sets the stage for a smooth binding process. You’ll need to trim the backing fabric twice this width by using Handle Rotary Cutter. For instance, for a ¾” wide binding, trim the backing to 1 ½ inches

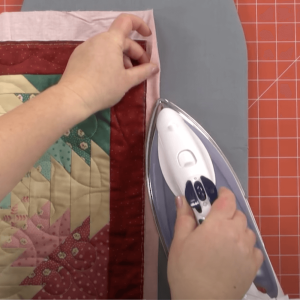
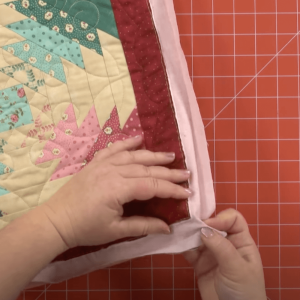
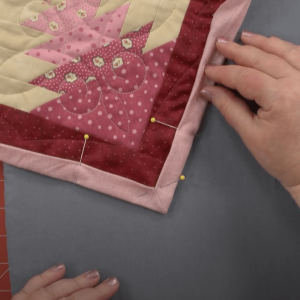
3. Press the Backing

Fold and press the backing fabric so it meets the edges of the quilt top. This step is repeated on all four sides to prepare for the quilt binding.
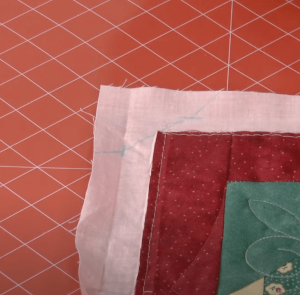
4. Mark the Corners

Place the Easy Miter Binding Tool at the corner of your quilt. Align the tool’s lines with the corner, and draw a line along its edge.

You’ll also draw another line at the intersection created by pressing, forming an “X.”

5. Create an angle and miter the quilt binding

What we are going to do is fold it in reserve. You might have to twist your quilt top around a little bit to get this angle lined up properly.

6. Pin and Sew

Fold the corner right sides together, aligning the “X” marks, and pin it in place. Sew along the line you’ve drawn, then trim the excess fabric, leaving a ¼ inch seam allowance.

And use 8-1/2-Inch Fabric Scissors with Comfort Grip to trim approximately a quarter of an inch away

6. Form the Miter

Turn the corner right side out to create a mitered corner. Use a point turner to sharpen the corner, then press.

7. Finish the Quilt Binding

Fold the pressed backing over to the quilt top, covering the raw edges. Topstitch close to the folded edge to secure the binding in place.

Why You’ll Love It

For many quilters, the binding process is often time-consuming. It can also be frustrating, especially when striving for professional-looking corners. With the Easy Miter Binding Tool, those days are behind you.

The Easy Miter Binding Tool saves you time and helps your bindings are perfect every time. It’s especially useful for smaller projects like quilts, wall hangings, and placemats, where precision matters most.

No longer do you have to piece or sew your binding the traditional way. This tool allows for a more streamlined process, ensuring your corners are perfectly mitered and your bindings look flawless.

Regardless of your experience level, this ‘quilt binding tool’ is an essential addition to your quilting & sewing notions. Therefore, the task of ‘binding a quilt’ will be simpler than ever.

Elevate Your Quilting Precision

The Easy Miter Binding Tool adds precision and ease to creating perfectly mitered corners on your quilting projects. That’s why every fabric cut needs to be accurate. Therefore, this is where the Handle Rotary Cutter come into play, serving as the perfect complement to your toolkit

Designed for comfort and ease of use, the anti-slide handle is ergonomically crafted to minimize joint fatigue. Whether you’re trimming the batting and backing for the Easy Miter Binding Tool or cutting pieces for your next quilting masterpiece, the Handle Rotary Cutter provide a clean, precise cut every time.

These blades are designed with versatility in mind, accommodating both right-handed and left-handed users. They are a must-have addition to every quilter’s collection of notions and supplies

Rotary Cutter designed for precision cutting in quilting and crafting projects

Ideal for Quilting Beginners and Seasoned Quilters

Whether you’re new to quilting or have been doing it for years, the Easy Miter Binding Tool is a valuable addition to your quilting toolkit. It simplifies the binding process, making it easier to finish a quilt with binding

After you get comfortable with the basic steps of using the Easy Miter Binding Tool, you’ll reach the stage where it’s time to ‘sew the binding on a quilt.’ Precision and patience are key in this essential phase, which elevates the edges of your quilt from raw to refined. Sewing the binding onto your quilt secures the layers together and provides a decorative finish

With the Easy Miter Binding Tool, this process becomes much simpler. The tool helps you fold the backing fabric accurately, so that when you sew the binding, it aligns perfectly with the quilt’s edges. This method streamlines the sewing process and eliminates common pitfalls like uneven binding or misaligned corners, allowing your quilt to look professionally finished with minimal effort

Give It a Try

If you’re looking for a way to streamline your quilting process and achieve professional-looking results, the Easy Miter Binding Tool is worth trying. It’s a small investment that can make a big difference in your quilting projects, making the process more enjoyable and less of a hassle.

Happy quilting! Here’s to beautiful quilts with perfectly mitered corners, all thanks to a simple tool that makes a big difference.

One thought on “Quilt Binding Instructions with the Easy Miter Binding Tool

Leave a Reply

Your email address will not be published.