
Quilt Binding Instructions with Rolly Sasher Collection Tool
Quilting is an art, a craft that turns simple fabric into cherished heirlooms, cozy comforts, or stunning pieces of home decor. A key step in quilting is adding the binding, which wraps up your project and makes it last longer and looks great. Let’s dive into how to use a standout tool in the quilting world – the Rolly Sasher Collection Tool.
In this blog, we’re focusing on the 1 1/4″ sasher tool, ideal for making quilt bindings that neatly cover the edge of your quilt.
Why the Rolly Sasher Collection Tool?
For many, the traditional method of cutting fabric for quilt binding at two and a half inches wide. Then, folding it in half is standard practice.
The Rolly Sasher Collection, however, opens up a world of possibilities. This tool allows you to customize your binding to any width you desire. For those who prefer a narrower binding, cutting the fabric two and a quarter inches wide by using Handle Rotary Cutter and using the 1 1/8″ tool becomes a breeze.
Step-by-Step Guide to Perfect Quilt Binding
Step 1: Preparing Your Quilt Binding Strip
Begin by folding your binding strip in half. If you’re working on a quilt with straight edges, cut your fabric strip on the straight grain. For quilts that have curves along the edges, it’s a good idea to cut the fabric strip on the bias. This helps the fabric stretch and fit smoothly over the curves
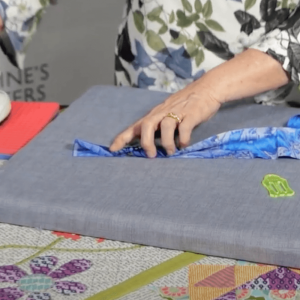
Step 2: Initial Pressing
Give the first little bit of your binding strip a press to start. As a result, this initial step helps in easing the rest of the process.
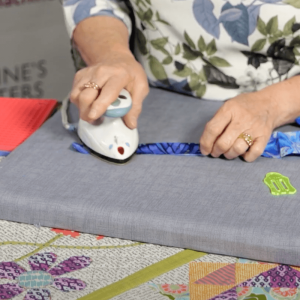
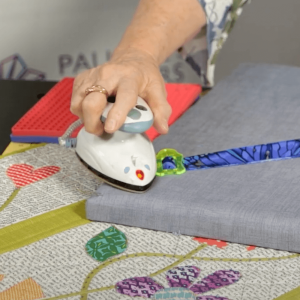
Step 3: Using the Rolly Sasher Tool
Grab the Rolly Sasher Collection Tool by the handle, slide up from underneath the fabric. Then, push straight back down. This simple motion begins the process of perfectly folding your quilt binding.
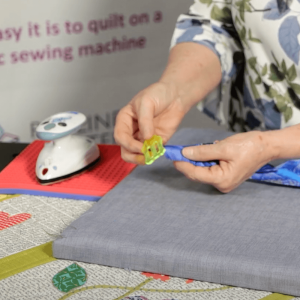
Step 4: Pinning for Tension
Pin the edge of your binding strip to your ironing board, using the double-fold pin technique that comes with the tool. This method helps hold your strip in place as you work. This creates even tension on both sides of the fabric, ensuring a crisp fold.
Step 5: Ironing Made Easy
With the iron in the curve of the tool, gently push forward. Therefore, you’ll immediately notice how effortlessly the tool guides the fabric. This helps align your quilt binding quickly and efficiently. The Rolly Sasher Tool stands out for being simple to use and really getting the job done.
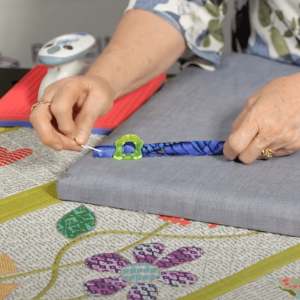
Step 6: Continue Down the Strip
Continue moving down your binding strip, repositioning your pin as needed to maintain tension. Make sure to keep the fabric tight without overstretching it. This way, the tool can take over and make your job easier.
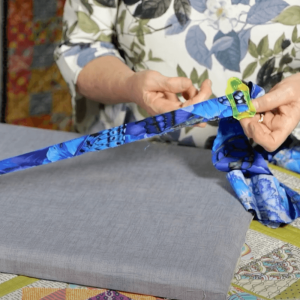
Step 7: Completing Your Binding
Work your way down until the entire binding strip is perfectly folded and pressed. This final step gets your binding all set to be attached to your quilt. It ensures a neat and professional-looking edge
Why It Works
The Rolly Sasher Collection Tool makes the binding process easier and improves it. It helps you get even widths and neatly pressed folds, so your quilt edges turn out cleaner and your finishes look top-notch. You can also try out various binding sizes and styles with this versatile set of tools, giving you lots of creative freedom
Final Thoughts
Binding isn’t just the last thing you do; it’s a chance to give your quilts some extra personality and make them last longer. With the Rolly Sasher Collection Tool, getting that great finish is way easier and actually kind of fun. So, give this tool a shot and notice how your quilt edges go from okay to fantastic. It really highlights your creativity and skill in every project